Understanding the ins and outs of a car diagnostic machine can seem daunting, especially with the increasing complexity of modern vehicles. This guide will equip you with the knowledge to confidently use a car diagnostic machine, whether you’re a DIY enthusiast or a seasoned mechanic looking to expand your skillset.
What is a Car Diagnostic Machine?
A car diagnostic machine, often referred to as an OBD scanner or code reader, is an electronic device that connects to your vehicle’s onboard computer system, also known as the Engine Control Unit (ECU). This connection allows the machine to retrieve Diagnostic Trouble Codes (DTCs), which are stored by the ECU when it detects a problem within the various systems of your car.
Types of Car Diagnostic Machines
There are various types of car diagnostic machines available, each offering different levels of functionality and catering to different needs:
- Basic Code Readers: These entry-level devices can read and clear basic DTCs related to engine performance and emissions. They are ideal for DIYers who want to understand simple engine problems.
- Advanced Code Readers: Offering more features than basic code readers, these machines can access additional data streams, such as live sensor readings and freeze frame data, providing a more in-depth understanding of your car’s health.
- Professional Diagnostic Scanners: Used primarily by mechanics and automotive professionals, these high-end devices provide comprehensive diagnostic capabilities, including module coding, bi-directional control over actuators, and access to manufacturer-specific data.
How to Use a Car Diagnostic Machine: A Step-by-Step Guide
While the specific steps might vary slightly depending on the make and model of your car and the type of diagnostic machine you are using, the general process remains relatively consistent:
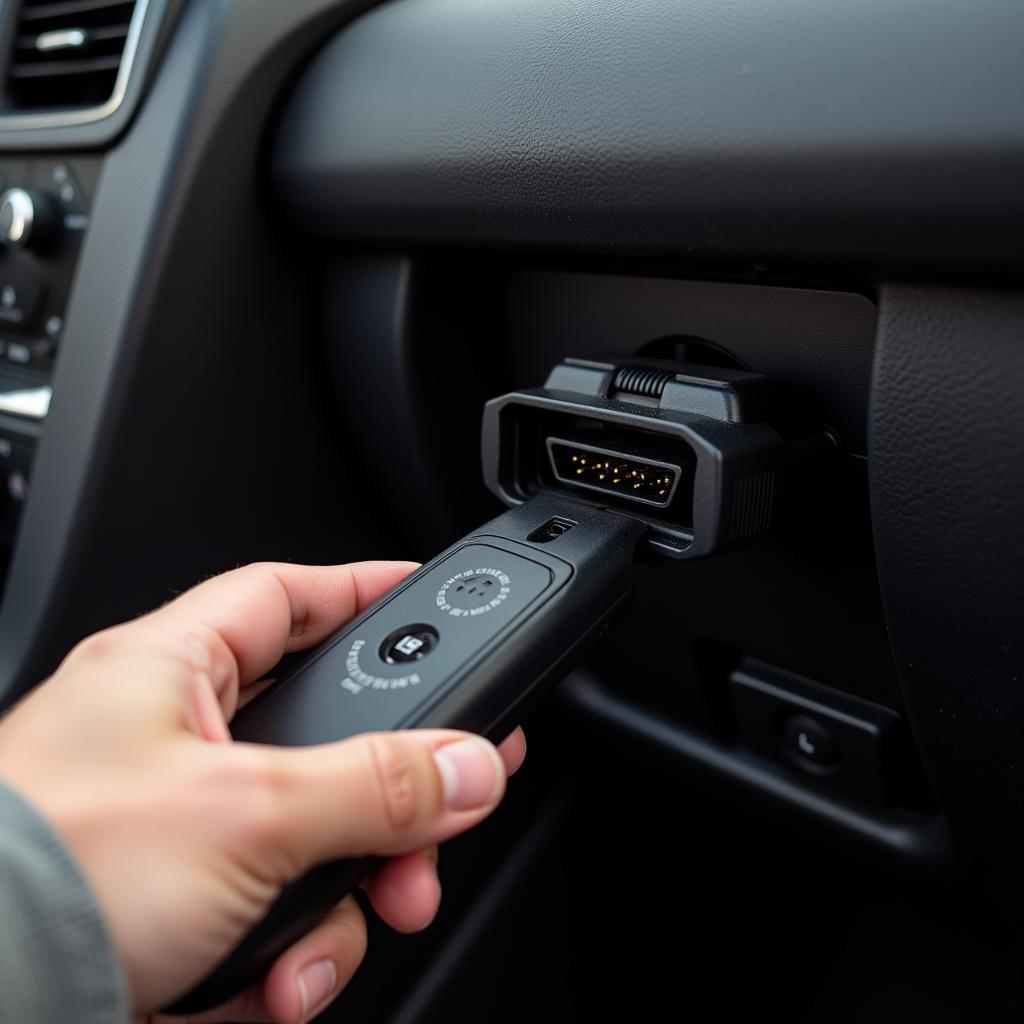
- Locate the OBD-II Port: This standardized 16-pin port is typically located under the driver’s side dashboard, beneath the steering wheel.
- Turn Off Your Car: Ensure your vehicle is turned off and the ignition is not engaged.
- Connect the Diagnostic Machine: Plug the diagnostic machine into the OBD-II port.
- Turn on the Ignition: Turn the ignition key to the “on” position but do not start the engine. This will power up the diagnostic machine and allow it to establish communication with the ECU.
- Follow On-Screen Instructions: Most diagnostic machines will guide you through the process, prompting you to select your car’s make, model, and year.
- Retrieve Diagnostic Trouble Codes: The machine will scan the ECU for any stored DTCs and display them on its screen.
- Interpret the Codes: Each DTC corresponds to a specific problem within your car’s systems. You can use the machine’s built-in code library or consult online resources to understand the meaning of each code.
- Address the Issue: Based on the code interpretation, you can proceed to troubleshoot and repair the identified problems.
 Connecting a Car Diagnostic Machine
Important Note: While a car diagnostic machine is a powerful tool for identifying car problems, it’s crucial to remember that it only provides clues. It does not offer a definitive diagnosis.
Benefits of Using a Car Diagnostic Machine
Utilizing a car diagnostic machine offers several advantages:
- Early Problem Detection: Identifying issues early can prevent minor problems from escalating into costly repairs.
- Cost Savings: Diagnosing problems yourself can save you money on expensive mechanic visits for basic troubleshooting.
- Improved Vehicle Performance: Addressing underlying issues can enhance fuel efficiency, engine performance, and overall vehicle reliability.
- Increased Knowledge: Regularly scanning your car with a diagnostic machine can provide valuable insights into your vehicle’s health and help you become a more informed car owner.
“A car diagnostic machine is an indispensable tool for anyone who wants to take control of their car’s maintenance,” says John Smith, Senior Automotive Technician at ABC Auto Repair. “It empowers car owners to understand their vehicles better and make informed decisions about repairs.”
Choosing the Right Car Diagnostic Machine
Selecting the right diagnostic machine depends on your individual needs and budget:
- DIY Enthusiasts: A basic or advanced code reader offering DTC reading and clearing capabilities is a great starting point.
- Home Mechanics: Consider an advanced code reader or a budget-friendly professional scanner offering live data streaming and some bi-directional control features.
- Professional Mechanics: Invest in a high-end professional scanner with comprehensive diagnostic capabilities, module coding, and advanced functionalities.
 Features of Car Diagnostic Machines
Conclusion
Understanding How To Use A Car Diagnostic Machine can empower you to take charge of your car’s health and save time and money in the long run. By following the steps outlined in this guide and choosing the right machine for your needs, you can unlock a deeper understanding of your vehicle and ensure its optimal performance.
Need more guidance on using a car diagnostic machine? Explore our other helpful resources:
- How to use a diagnostic machine for cars
- What is car computer diagnostics
- How much to put your car on diagnostic machine
- Can I do diagnostics check on my own car
For personalized assistance and expert advice, contact our team via WhatsApp: +1(641)206-8880, or Email: [email protected]. Our dedicated customer support team is available 24/7 to address your queries and guide you through any challenges.

Leave a Reply