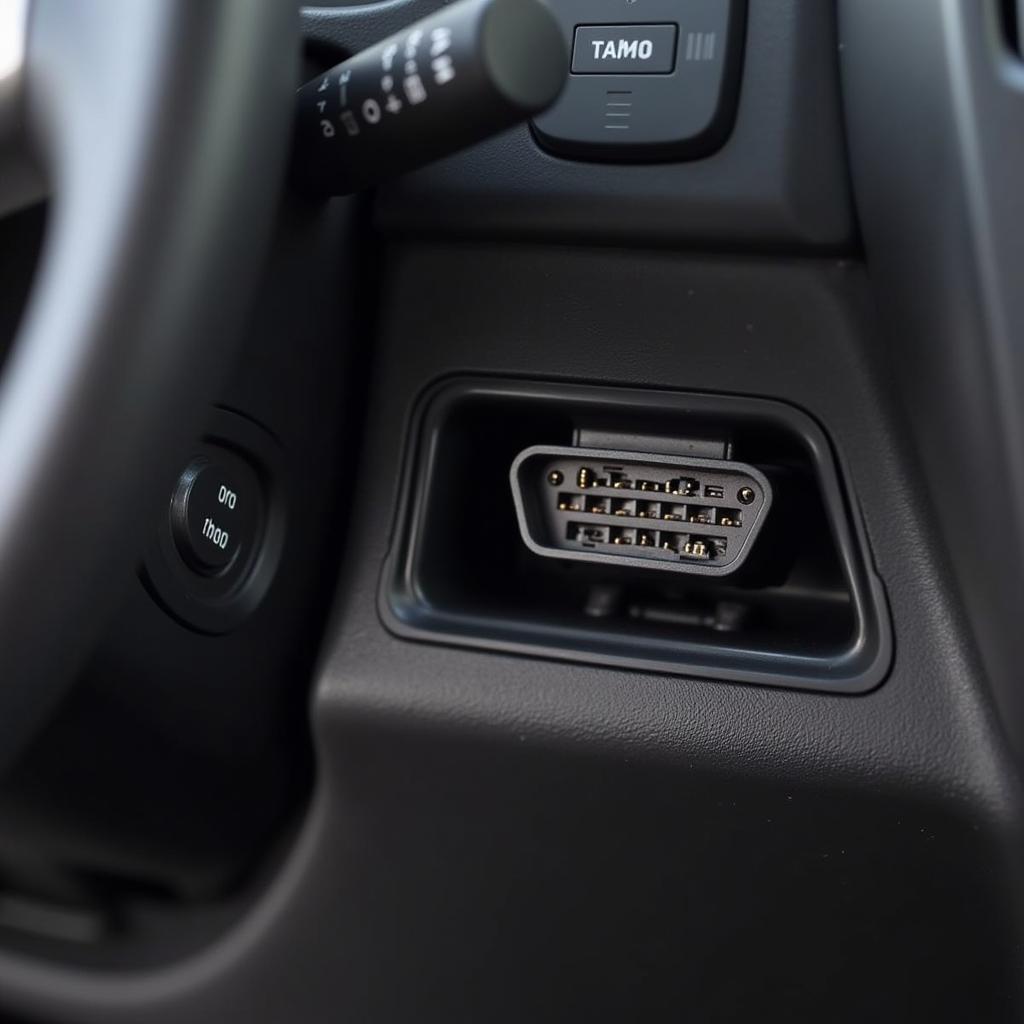
Choosing the right car diagnostic machine and installing it correctly are crucial steps for any mechanic, DIY enthusiast, or car owner. A well-installed car diagnostic machine can unlock a wealth of information about your vehicle, enabling you to identify and potentially fix issues before they become major problems. This guide will walk you through the process of how to install a car diagnostic machine, ensuring you’re equipped to diagnose car problems like a pro.
Choosing Your Car Diagnostic Machine
Before diving into the installation process, selecting the right car diagnostic machine for your needs is essential. Several factors influence this decision:
- Vehicle Compatibility: Not all diagnostic machines are compatible with all vehicle makes and models. Research which machines are compatible with your car’s make, model, and year.
- Functionality: Determine the features you need. Some machines offer basic code reading, while others provide advanced functionalities like live data streaming, bi-directional control, and special functions.
- Budget: Car diagnostic machines vary in price. Set a budget before you start shopping to narrow down your options.
- User Friendliness: Consider your technical expertise and choose a user-friendly machine with an intuitive interface.
Once you’ve selected your ideal car diagnostic machine, you can proceed with the installation.
Gathering the Necessary Tools
Before starting the installation, gather the following tools:
- Car diagnostic machine and its accessories (cables, adapters)
- Laptop or tablet (if required)
- OBD-II adapter (if not included with the machine)
- Screwdriver set
- Electrical tape (optional)
- Zip ties (optional)
- User manual for your specific car diagnostic machine
Having these tools ready will make the installation process smoother.
Locating the OBD-II Port
The OBD-II (On-Board Diagnostics) port is the gateway to your vehicle’s computer system. In most cars manufactured after 1996, you can find it under the dashboard on the driver’s side. However, the location can vary depending on the make and model. Refer to your car’s owner’s manual for the precise location of the OBD-II port.
Connecting the Car Diagnostic Machine
With the OBD-II port located, follow these steps:
- Turn off the ignition: Ensure your car is turned off and the key is removed from the ignition.
- Connect the diagnostic machine: Plug the diagnostic cable into the OBD-II port. The connector is designed to fit only one way, so don’t force it.
- Connect to power (if needed): Some diagnostic machines require external power. If yours does, connect it to your car’s 12V power outlet or a power source using the provided adapter.
Installing Software (If Applicable)
Some advanced car diagnostic machines require software installation on your laptop or tablet. If this is the case with your machine, follow these general steps:
- Insert the software CD/DVD (if provided): Many machines come with a software CD/DVD. Insert it into your computer’s drive and follow the on-screen instructions.
- Download software (if needed): If no CD/DVD is provided, you’ll likely need to download the software from the manufacturer’s website.
- Follow on-screen prompts: Once downloaded, run the installation file and follow the on-screen prompts to complete the installation.
Testing the Connection
With the hardware and software set up, it’s time to test the connection:
- Turn on the ignition: Turn the ignition key to the “on” position but don’t start the engine.
- Power on the machine: Turn on your car diagnostic machine.
- Establish connection: The machine should establish communication with your vehicle’s computer. You might need to select your car’s make, model, and year on the machine’s interface.
Using Your Car Diagnostic Machine
Once connected, you can start using the machine’s features:
- Read & Clear Codes: Identify and clear Diagnostic Trouble Codes (DTCs) stored in your vehicle’s computer. These codes provide insights into potential problems.
- Live Data Streaming: View real-time data from various sensors, such as engine RPM, speed, coolant temperature, and more.
- Bi-directional Control: Test various components by commanding them to activate (e.g., turn on fuel pump, open/close EGR valve) – only available on some machines.
Expert Insights
“A common mistake people make is assuming all car diagnostic machines are created equal,” says John Smith, a seasoned mechanic with over 20 years of experience. “Investing in a high-quality machine compatible with your vehicle’s make and model can save you significant time and money in the long run.”
Conclusion
Learning how to install a car diagnostic machine is a valuable skill for any car owner. By following these steps, you can easily install and start using a car diagnostic machine to monitor your vehicle’s health, identify potential issues, and potentially save yourself from costly repairs down the line.
Remember to always consult your car’s user manual and the diagnostic machine’s instructions for specific guidance related to your vehicle and equipment.
FAQs
1. Can I install a car diagnostic machine myself?
Yes, installing a car diagnostic machine is generally straightforward. This guide provides a step-by-step approach to help you through the process.
2. What is an OBD-II port?
The OBD-II port is a standardized connector found in most vehicles manufactured after 1996. It allows external devices, like car diagnostic machines, to access the vehicle’s computer system.
3. What if my car diagnostic machine isn’t working?
Double-check the connections, ensure the ignition is on, and consult the user manual for troubleshooting tips. If issues persist, contact the manufacturer’s support.
4. Can I use any software with my car diagnostic machine?
No, always use the software provided by the manufacturer or recommended in the user manual for compatibility and optimal performance.
5. What should I do after reading the codes?
Research the codes online or consult a mechanic to understand the potential problems and appropriate repair steps.
Need assistance with your car diagnostic needs? Our team of experts is available 24/7 to provide support. Contact us via WhatsApp at +1(641)206-8880 or email us at [email protected].

