Removing an upper control arm often seems like a daunting task, but with the correct car tools and a clear understanding of the process, it can be surprisingly straightforward. This article provides a comprehensive guide on how to effectively remove an upper control arm, equipping you with the knowledge and confidence to tackle this job yourself or make informed decisions when seeking professional help.
Understanding the Upper Control Arm and Its Removal
The upper control arm is a crucial suspension component that connects the steering knuckle to the vehicle’s frame, influencing wheel alignment, stability, and overall handling. Its removal might be necessary due to wear and tear, damage, or performance upgrades. Before attempting removal, understanding its function and the tools involved is essential.
Why Remove an Upper Control Arm?
Several reasons might necessitate the removal of your upper control arm:
- Worn Bushings: Bushings, the rubber components within the control arm, can degrade over time, leading to noise, vibration, and poor handling.
- Bent or Damaged Control Arm: Impacts from potholes or accidents can bend or damage the control arm, compromising its integrity.
- Performance Upgrades: Aftermarket control arms can offer improved handling and performance characteristics.
Gathering the Necessary Car Tools
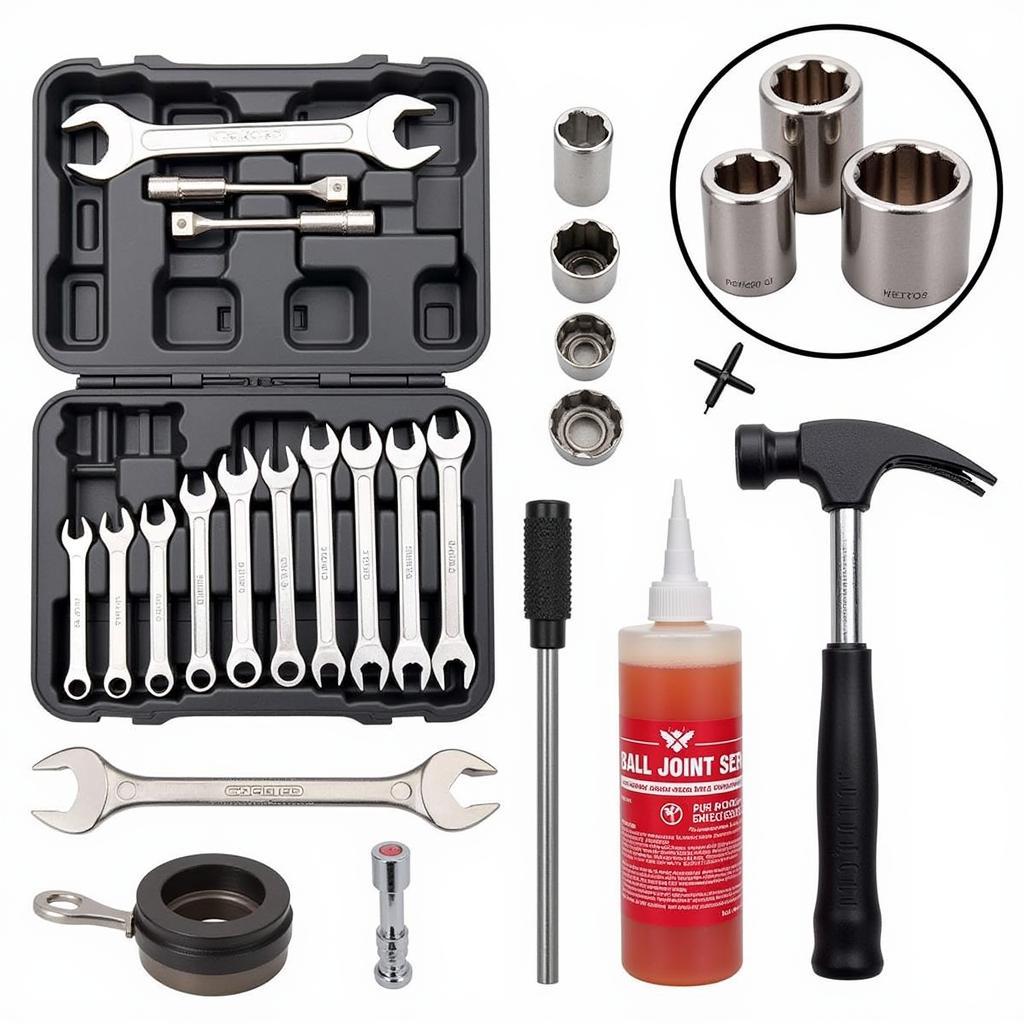
Having the right tools at hand is paramount for a smooth removal process. Here’s a list of essential tools:
- Jack and Jack Stands: Safety first! Securely lift and support your vehicle.
- Wrench Set: Different sizes will be needed for various bolts and nuts.
- Socket Set: Including extensions and a breaker bar for stubborn fasteners.
- Ball Joint Separator: Essential for safely disconnecting the ball joint from the steering knuckle.
- Penetrating Oil: Helps loosen rusted or seized bolts.
- Hammer: For persuasive encouragement when dealing with stuck components.
- Torque Wrench: Ensures proper tightening during reassembly.
 Essential Tools for Upper Control Arm Removal
Step-by-Step Upper Control Arm Removal
Once you’ve gathered your tools, follow these steps for a safe and efficient removal:
- Secure the Vehicle: Park on a level surface, engage the parking brake, and use jack stands to securely support the vehicle.
- Remove the Wheel: Loosen the lug nuts before lifting the vehicle, then remove the wheel completely.
- Disconnect the Brake Caliper and Rotor: Carefully remove the brake caliper and rotor to gain access to the control arm components.
- Disconnect the ABS Sensor and Brake Line (if applicable): Detach these components to prevent damage during the removal process.
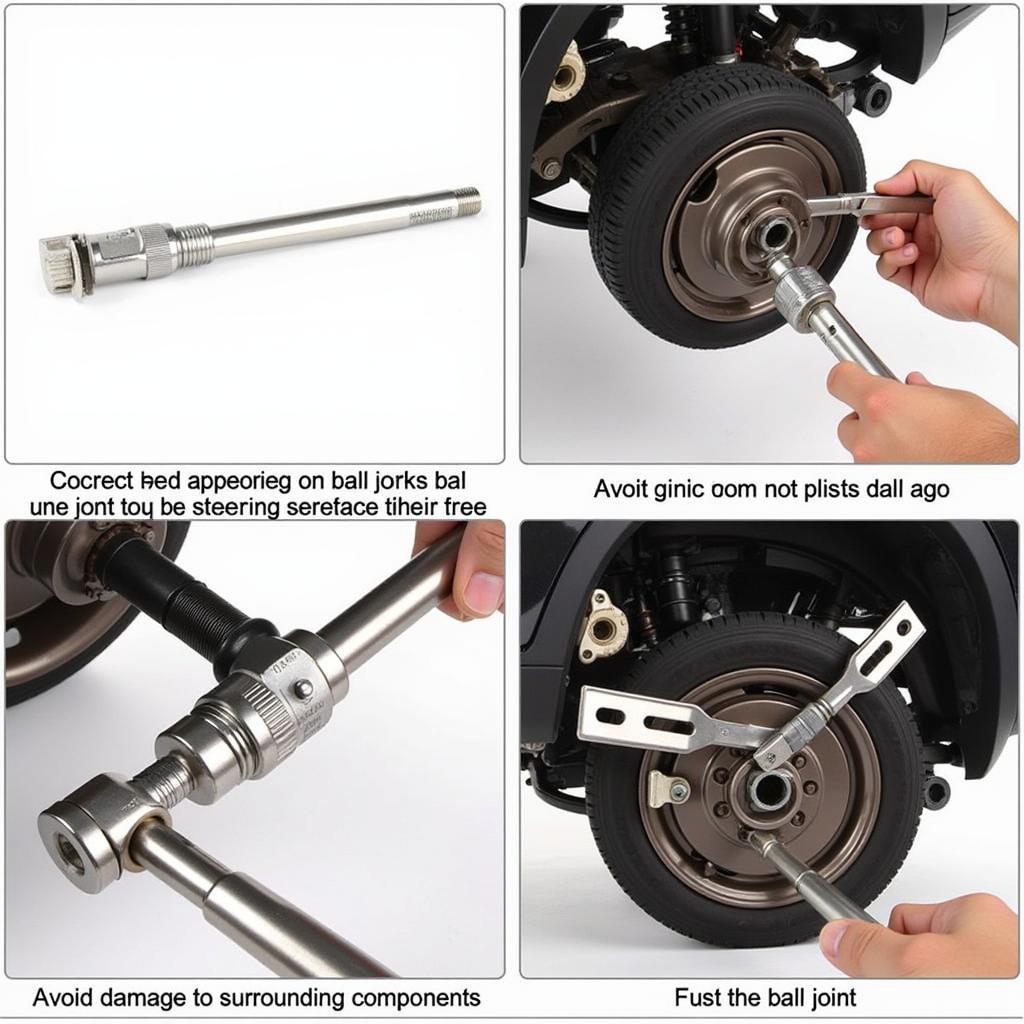
- Separate the Ball Joint: Use a ball joint separator to safely disconnect the ball joint from the steering knuckle.
- Remove the Control Arm Bolts: Locate and remove the bolts securing the upper control arm to the vehicle frame and steering knuckle. Penetrating oil can be helpful for stubborn bolts.
 Disconnecting the Ball Joint from the Control Arm
- Lower the Control Arm: Carefully lower the control arm, ensuring no wires or hoses are snagged.
Expert Insight: John Miller, ASE Certified Master Technician
“Remember, patience is key when removing seized bolts. A little penetrating oil and some gentle persuasion can go a long way in preventing damage.”
Troubleshooting Common Issues
Sometimes, the removal process isn’t completely smooth. Here are some common issues and solutions:
- Seized Bolts: Apply penetrating oil and allow it to soak before attempting removal again. Heat can also be helpful in loosening stubborn fasteners.
- Difficult Ball Joint Separation: Ensure you are using the correct ball joint separator and applying force in the appropriate direction.
Expert Insight: Maria Sanchez, Automotive Engineer
“Always use the correct tools for the job. Improvised tools can lead to damage and potential safety hazards.”
Conclusion
Removing an upper control arm requires the right tools and a methodical approach. By following these steps and understanding the process, you can successfully tackle this task. Remember to always prioritize safety and consult a professional if you encounter any difficulties. Knowing how to use the right car tools to take out the upper control arm is crucial for maintaining your vehicle’s suspension and ensuring a smooth, safe ride.
FAQs
- How often should I replace my upper control arms? Control arm lifespan varies depending on driving conditions and vehicle usage. Inspect them regularly for wear and tear.
- Can I drive with a damaged upper control arm? No, driving with a damaged control arm is dangerous and can compromise vehicle stability.
- Is professional installation recommended? While DIY is possible, professional installation ensures proper torque and alignment.
If you need help with personal care tools for after a stroke, or an emergency glass cutter, consider visiting our resources on personal care tools for stroke patients to assist with showering and emergency cutting glass tool fo car escape. We also have a guide on 2003 town car front strut replacement without spring compression tool which might be helpful.
Need help? Contact us via WhatsApp: +1(641)206-8880, Email: [email protected] or visit us at 910 Cedar Lane, Chicago, IL 60605, USA. Our customer service team is available 24/7.

Leave a Reply